 3Denlive
3De Quick Start Guide
Animate with keyframes
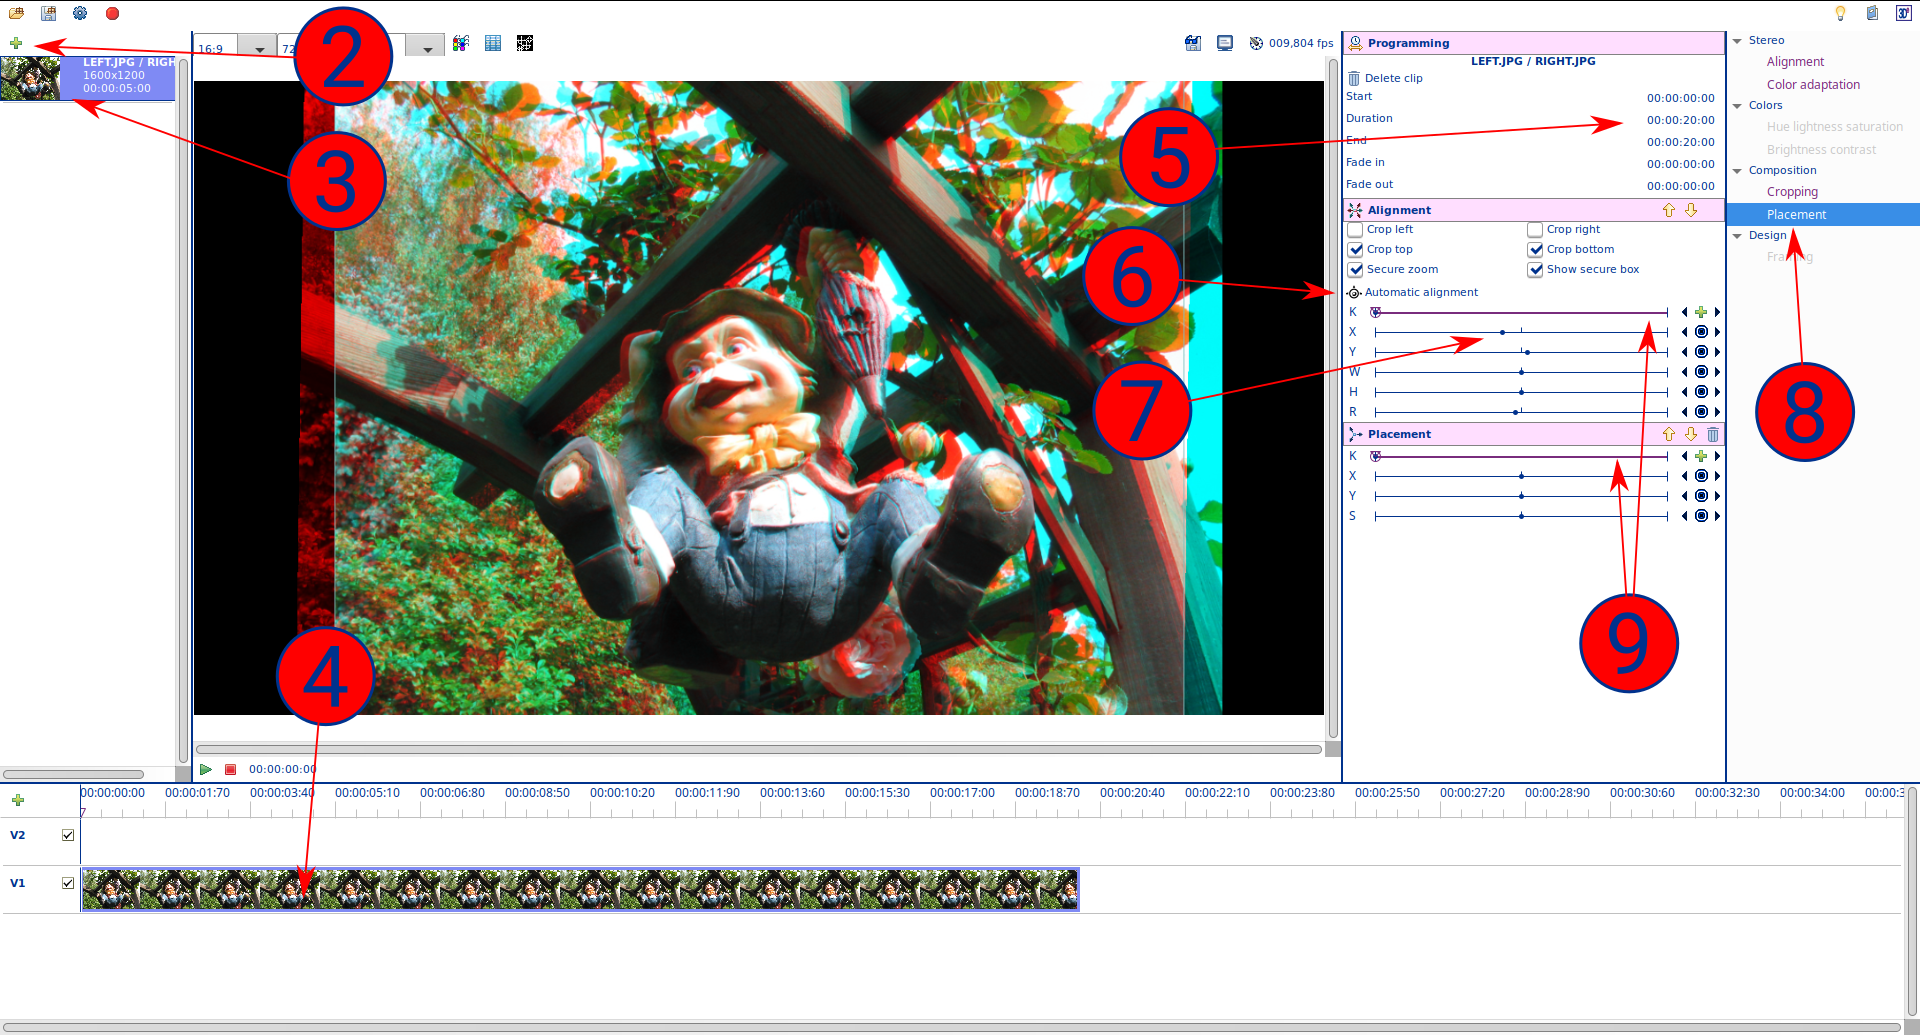
⓵ download and unzip this project file.
⓶ launch 3De. In the new project, import the left and right JPG of the project.
⓷ double-click on the new thumbnail to add it to the timeline.
⓸ click on the new clip in the timeline.
➄ change its duration to 25 seconds.
➅ click on "Automatic alignment". This cha-cha has strong distortions that can't be handled with simple adjustments, thus the result won't be perfect. But, this is an interesting fact for this tutorial.
➆ adjust the X slider to set the stereo view "all behind the window" = no horizontal shilt on the shoes. You see there is style a small vertical shift on them. They are several small shifts like this in the picture, because of an approximative cha-cha. Impossible to solve them all without doing a kind of morphing on the pictures. The whole stereo should stay quite plaisant to view.
➇ double-click to add a Placement processor to the clip.
➈ you see that both the Alignment and the Placement processors have a first "K" slider: the Keyframe tools. Each of them has a first blue point, surrounded by a purple circle: the first Keyframe. When you adjusted the picture on points ➅ and ➆, you defined the configuration of this first keyframe. If you play the video like this, this configuration will stay like this during the whole clip duration.
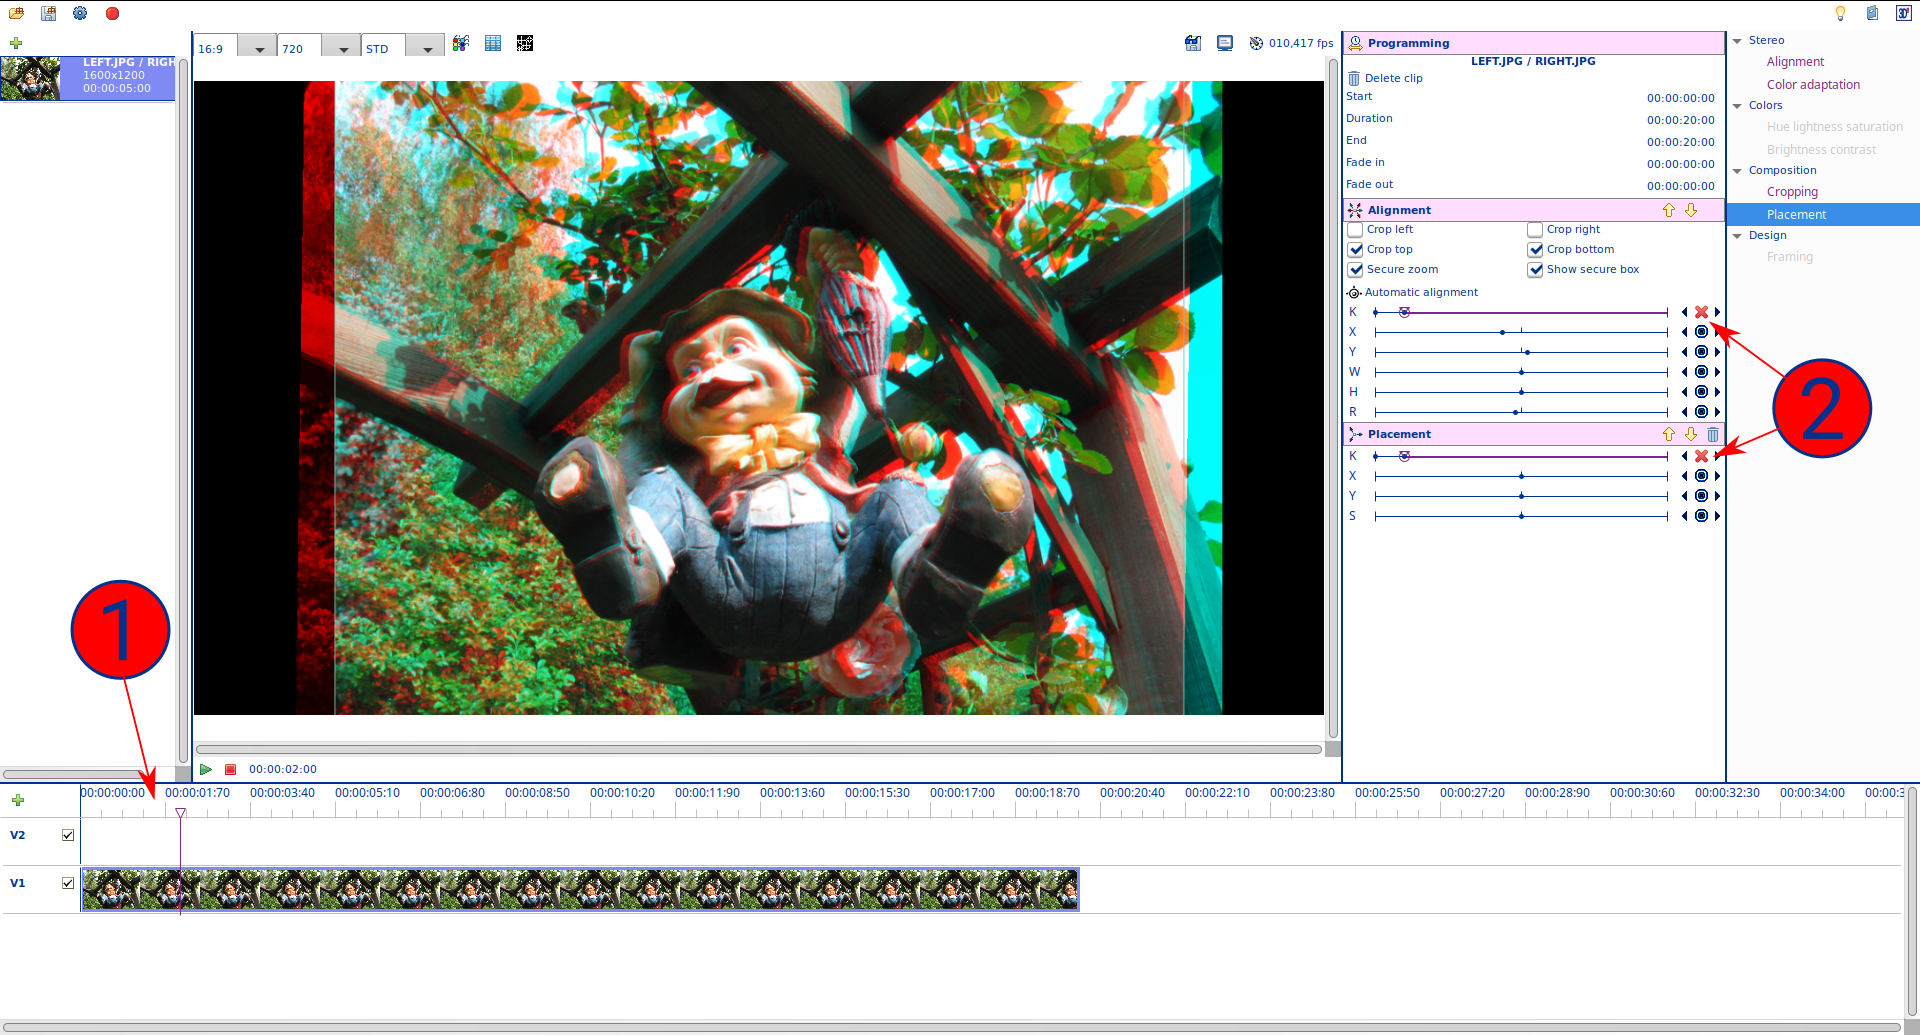
⓵ click on the timeline ruler to set a time around 2 seconds. Click on the clip to get back the processors properties.
⓶ click on both green + buttons. You should get a new keyframe on each slider. The configuration of these key frame are identical to the original one. If you play the video, it is style like previously.
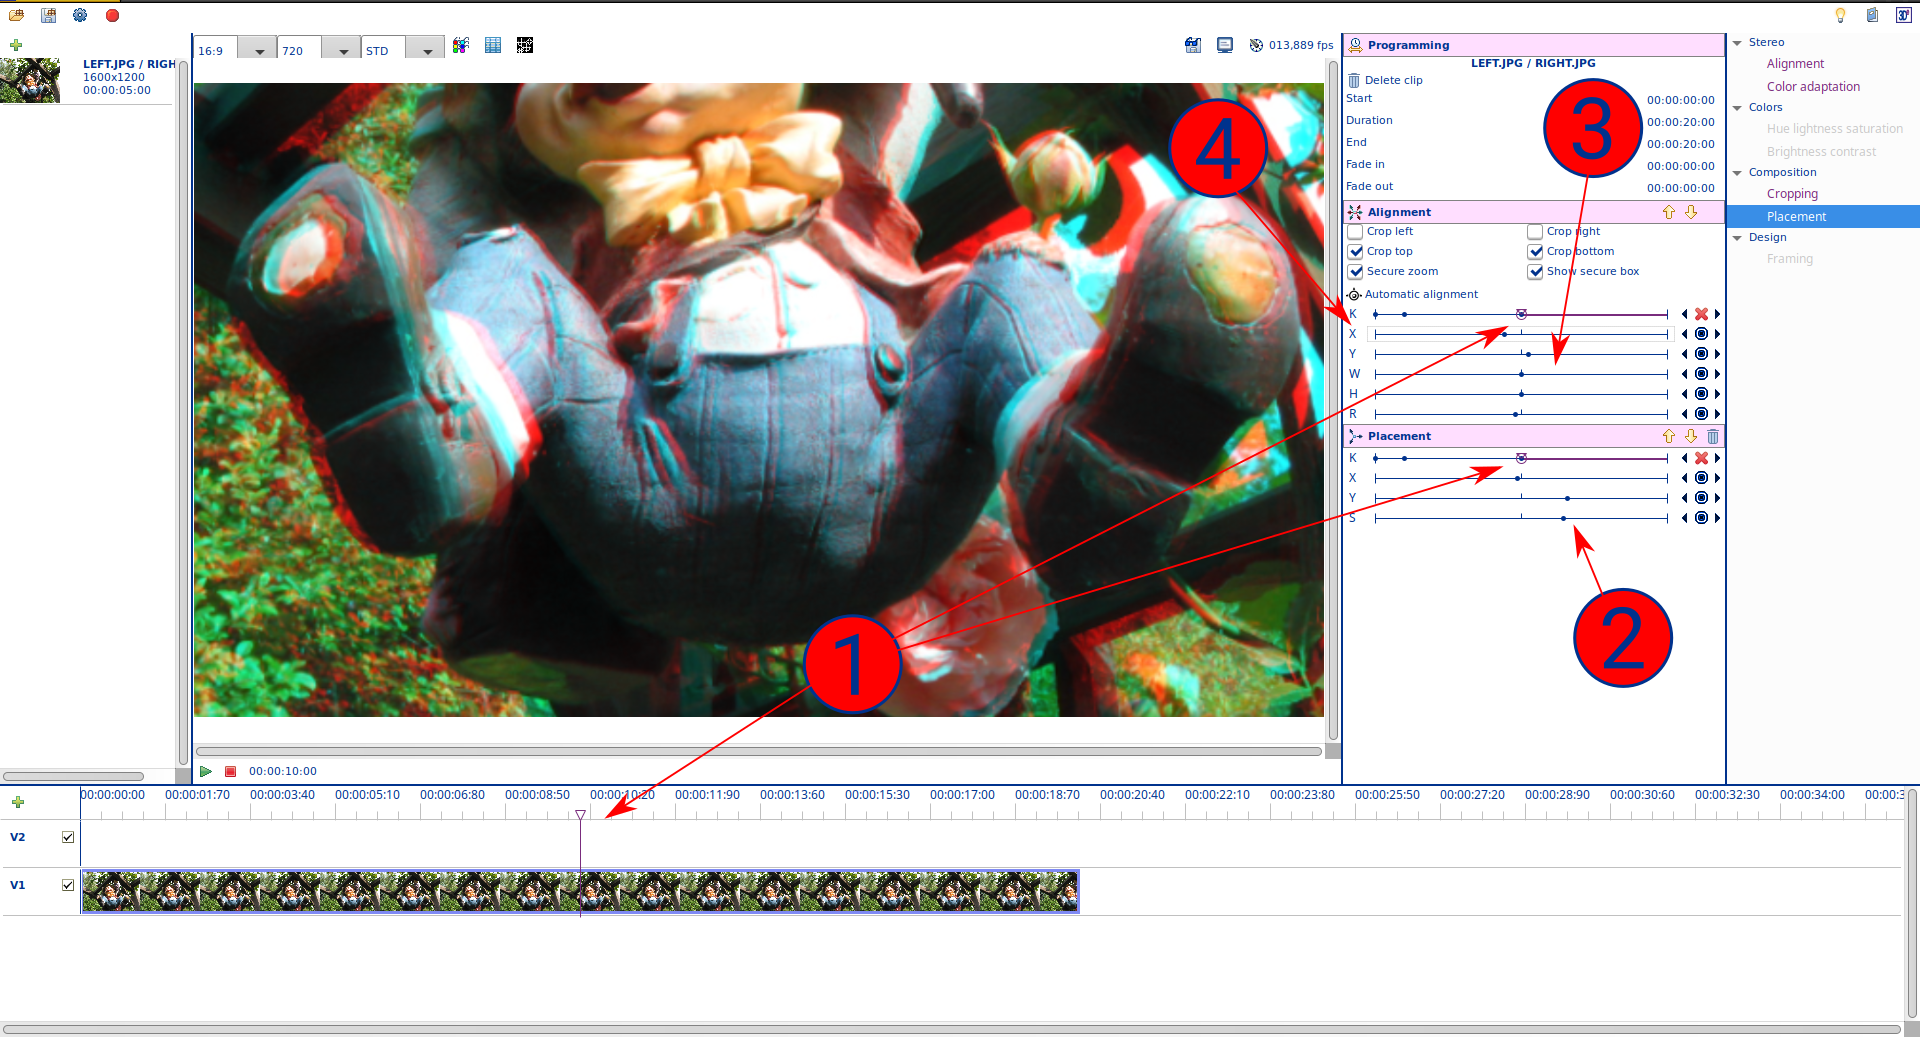
⓵ do the same to add a new keyframe around 10 seconds.
⓶ adjuste the size and position of the view to get the shoes as large as possible.
⓷ as the vertical shift on the shoes becomes a bit more important, you may play with the alignment tool to get a better alignement on the zoomed gnome, the surrounding elements being less important (on this example, you need to do it manually, because the automatic alignment style keep a big importance on the surrounding elements, thus not really align on the gnome itself).
⓸ finally adjust the X position of the alignment to get a strong popup effect. If you play the video from the beginning, you should now get an animated zoom on the gnome.
Do the same for the end of the video.
As the first alignment is only working on the original image, when unzoomed at a very tiny size, you can't obtain an important stereo shift.
You will need to add a new aligner, at the end of the processor list, working on the whole image at the full size of the animation. See the project file in the original zip.
Remark: the black background is not the best for a good stereo far effect, because eyes lack of reference points for the convergence. You could add something with colors and textures under the gnome picture.
To be continued...

